Sunday, November 11, 2012

Walls Go Up for the Addition

So after months of talk, plans, permits and changes to the inside of our house, it finally became time to build the actual addition.

Right before our final plans went in, we decided to go with a block addition rather than a wood frame with Hardie Board. We did this for several reasons. The fact that it was going to be a more solid structure and ultimately, surprisingly, it ended up costing about the same the wood frame would have cost helped make the decision. However, the fact is we liked the look of the block with a flat roof and a cement parge coat. The one drawback is that it reduces the rooms by about 4" along the outside walls. We can live with that.

The bricks went in quickly because it is basically like building with Legos. The blocks are 5 1/2" wide and only cost about a buck apiece. Crazy thing is that the combined cost of the brick lintels (the long "beams" that stretch over the tops of the tops the windows and doors) was about the same as the total cost of the rest of the bricks used for the addition.

This is basically the same view as above three days later.The vast majority of the work was done in two days.

Some of our existing roof needed to be removed in order to have space for the new rafters on the addition to tie into the existing house. The rafters will match up with the rafters in the attic on a one for one basis and the weight is all set to be distributed along what used to be the outside wall of our house.


This is the eventual patio door and wall o' windows space. You can see the humongo lintel that spans all 9' of opening across the top.

Basically, everything went as planned and the work was really well done. After this picture was taken, the masons also removed some of the brick from the outside wall that will soon be in the way. They also bricked over the window at the far right of the photo and cut a space for the doorway to the "Crawfish Memorial Hallway and Kitchen Bypass."

The scaffolds were pretty amazing. They went up in an instant, were rock solid and were gone before I knew it. Somebody, somewhere nailed the whole form and function thing with them.


And speaking of scaffolds... Ummm maybe 20 years ago I was absolutely captivated one night watching a Kung-Fu movie centered around, are you ready, SCAFFOLD BASED KUNG FU!

The movie was pretty funny and had this neat gimmick involving a Sholin monastery and yes.. scaffolds! A con-man looking to hide out is sentenced to build scaffolds around the walls of the monastery and as he watches the monk perform their martial arts exercises, he mimics them with his building techniques. I have to tell you, it was a crazy fun cocktail of comedy, action and flat out absurdity. It totally worked and was a lot of fun.

The movie always stuck with me and I just looked up the title (EVERYTHING is on the internet) and the movie is called "Return to the 36th Chamber" The trailer is a bit long, but you get the idea.


Sunday, November 4, 2012

Digging the Footings and Dumping the Stump

(Maybe it's me, but the title of this post sounds... odd. 'Nuff said.)

Okay, with the porch and deck out of the way and into the dumpster, the dumpster gnomes came and took it away. In its place they left... another dumpster! It is a home renovation miracle!

Our contractor got to work with his Bobcat and a rented mini-excavator and started to level the ground and work on getting the stump from the maple tree out. The number of roots was pretty amazing and they covered a very wide area. You can see some of them stacked up in the picture.

 
The stump well...errr.... stumped them for a bit. They worked at it for quite a while but it just wouldn't budge. So, another tool was rented, The ever popular stump grinder. Think of it as a circular saw with only a couple of teeth (that look like hippo molars) mounted on the front of a tracked lawn mower. It spins and wears away at the stump creating an impressive shower of saw dust.

Eventually, this wore away enough of the stump so that the excavator could pull it up out of the ground. Once the dirt was knocked free it was surprising to see how shallow the roots really were for such a big tree.

The stump was walked/pushed over to the dumpster and after a fair amount twisting, it eventually got in there.

I have to admit that as a kid, I was never a "truck" type. I don't think I ever played with bulldozer and truck type toys. Give me a tank or airplane any day. But, I have to admit now, they are really cool to watch. Crawling around doing neat stuff like digging a hole in a second and a half that would take me an hour. They really do seem alive. In a nice Mike Mulligan and His Steam Shovel way, not like Killdozer.

With the stump and roots out of the way, the trench for the footers and their required insulation panels went in very quickly. No surprises.


We kept the two pieces of slab that were already there and filled in a lot of the space with crushed concrete which apparently goes for about $7 a ton. Seriously. This allowed us to pour the slab up flush with the existing floor level of our house. Now the addition will be flush and not a "step down" when we enter it from inside the house.


The concrete pour took place and I didn't get a picture of it happening. However, here is a potential Pulitzer winning photo of what the slab looked like through my kitchen door several hours later.


The plastic trapped the moisture in and that helps with how the concrete cures. It came out great. Very smooth and level. So far so good.

The concrete subcontractor is also the masonry contractor. We needed a week and a hurricane to go by before the walls could start going up. In the meantime, the dumpster gnomes came back and worked their magic once again and left us with a replacement dumpster (that is already 1/2 full again.)

Will miracles never cease?

Monday, October 8, 2012

Taking Down the Porch and Taking Up the Deck

Well, we had a few weeks on hold because of various schedule issues but we are back up and running. Our contractor finished up the official drawing of the addition and then we walked it through the permit process. All in all, it could have been worse but it is pretty much the nature of the beast that 15 minutes of talking to people and filling out the required forms ends up taking 3-4 hours of waiting in various lines. However at the end of the day (well, actually two days) we were all set. The plans were approved and we got our building permit and have it proudly displayed in the front window.

One of the early "sweat equity" opportunities identified for us in this project was the destruction of our porch and deck.

The area of the porch and deck fit entirely inside the walls of the new addition. There are partial concrete slabs that are going to be kept in place to help make the basis of the new floor in the addition. (Fresh concrete will be poured over them.) The Porch was 10'x15' and the deck was 10'x17'. Both had been built before we purchased the house and honestly, they had been built very well. They served their purposes but their time had come.


The first issue was clearing everything out of the way. The porch had turned into a bit of an outdoor junk room years ago but after last summer it had served as a temporary shed as well. As you can see, there was a lot of "stuff" that needed to go some place else before we could start wrecking anything.


So after a little child labor, we had a lot of stuff in the trash and the rest of it under tarps. (This did remind me that, "Oh yeah... I'm still gonna need a new shed with this is all over." D'oh.)


Being fully aware of our limitations, Mrs Toy Making Dad and myself called in some assistance...

To the Crawfish Signal!

Lucky for us, Crawfish himself was available to pop on by in the Saab-marine with assorted pry bars and a nifty hammer or two. He was a tremendous help and honestly, there is no way we could have gotten this project done without his help. (Seriously - Thanks man.)

Having seen enough videos of people pulling down structures and taking the rest of the house or a bunch of windows with them, we decided that we would "unbuild" both structures as opposed to just smashing them and then cutting stuff up.

Act 1, Scene 2 from Tennessee Williams'
"Crawfish on a Hot Tar Roof"

We started on the roof. Initially I carefully took each staple out of the shingles and pulled them off one at a time. I really didn't want to worry about anyone, especially our little one, stepping on those. We made good progress but as the sun came up and we got closer to the edge of the porch, we switched to pulling up big sheets at a time. The staples pretty much pulled right up and the ones left behind were no threat since we left them in the boards. The tar paper underneath was a real, ahem, sticking point. I wonder if we had started earlier in the day if it would have peeled off easier? Live and learn.

With the shingles gone it was now, HAMMER TIME!

We hammered the plywood from inside off of the 2x4 rafters and bent them back to pry off as needed. A little difficult back at the new roof line because of the tar paper, but it went surprisingly fast. So fast in fact... that I failed to get any pictures with the sheathing in place.

Sledge hammer hits on the gutter end freed up the rafters and then we were able to twist them off of the hangers attached to the house. The far wall was made of 4x4s that were bolted together. Seriously  sturdy stuff. Lacking a Sawzall (or similar non-trademarked reciprocating saw) we took the back wall down as one piece and tossed it in the dumpster. Bye porch. (Memories include a dinner when we first moved in, the older girls' birthday party in 1st grade, a lot of toys and whole bunch of lint from the dryer covering the floor. And spiders. Lots of spiders.)

We then turned our attention to the deck. The deck was made of 2x8's and everything was nailed, as opposed to screwed, together. Pretty much just attacked it one board at a time with pry bars and hammers.

No big surprises in the destruction although there was an odd dynamic where every board that my wife went to take up just popped up with no problem while the boards Crawfish and I attempted were all held in with tungsten or depleted uranium 17" long twisted nails. We got it done. Eventually.

There were a couple a surprises that we uncovered though. First off we found that there was a slab poured along the back door that was covered by the deck. This may save us a few bucks when the new slab is poured for the addition floor.


There were quite a lot of patio stones used as supports and various places around the porch and deck. There are enough that I think they could form the basis of the floor for the new shed and we wouldn't have to pour a slab for it instead. That would save money, but the main thing is I like the idea of not having to break up a slab if I ever want to move the shed


We also found a concrete monkey skull. We set it on post as a warning to all the followers of the various monkey cults in our neighborhood. (Note to self - maybe you should play with concrete more often.)


So, a second day of a few tidbits of destruction and some general cleaning up and we are set and ready for the footings to be dug and then poured. The sand is from, of all places, the sand box.


The back of the house looks huge now, so we have to fill it up with buildings and what not.


Sunday, August 12, 2012

Counter Intelligence

So, the counters went in and they look great. It was a one day job and although there is still some touch up and a side piece to go in, things went pretty well.

We went with soapstone. The name makes it sound like it is soft and in relative terms it is, but hey, we are still talking about stone here. It does scratch easier than other stones, but the scratches are relatively easy to sand. The neat thing about it is that it has a lot of character with some pretty neat marbling wrapped through it. My pictures don't do it justice but I'll give it a shot.


Here is the main sink and dishwasher side of the kitchen. Once I had seen the below the counter sink set up at my in-laws', I knew it was what I wanted in our new kitchen. It is super convenient to just sweep things directly into the sink and I never liked the exposed lip of the sink on our old counter. (It just never seemed clean.

The little prep sink is great but I think we may have made a (hopefully correctable) mistake. It is super handy to have a second sink there when two of us are in the kitchen but yesterday when I did my first cooking in the kitchen; I realized that we should have a garbage disposal in there. Our plumber had recommended against it but now I'm having second thoughts. The main sink is where the dishes will get scraped but I think the prep side is where a lot of the peels and what not will be most likely to end up. Still, it's all good. We'll see.

Like I said before, there is neat marbling in the stone. There are veins of other rocks and colors. There is a lot of green in the stone and right next to the stove there is a cool patch that has the look of obsidian or emerald ribbon candy.

The appearance of the counters changes dramatically as mineral oil is added. The oil doesn't penetrate the surface but it helps in the natural darkening process that the stone goes through. The counters go from grey to almost black after the oil is applied. There are other swaths of green throughout the counter. It does give it real character. This picture is in-between oilings so you can see how much the counter color lightens up. (Although, it isn't quite this bright, I just took a bad picture.)

We have a small counter next to the fridge. The "side splash" on it still needs to be installed and while it looks great, I think we are going to have to change it. The front of the counter extends too far out and the refrigerator door hits the corner abruptly. Rounding the corner might be necessary or trimming the whole front. Moving the fridge is a limited option but we'll have to find a happy medium.

We were going for a semi-rustic sort a kitchen look and the stone countertops are helping to pull that off. They go really well with the white cabinets and the stone looking tile we used.

Sunday, July 29, 2012

Tile Goes Down and So Does the Maple Tree

This week's big change inside the house was that the tile went down in the kitchen and in the hallway and 3/4 bath. Installation took a day and a half. One day to lay the tile and the next morning to come back and grout them. However, to make room, the washer, dryer, refrigerator and dishwasher all had to move into the former dining room. It made things a little tight to say the least.

In shopping for tile we had purchased a bunch of individual tiles from the two big "home centers" and then took them home to see how they would look. Even though we didn't go with any of these tiles, it did give us a starting point to know what we did and didn't want to go with.


The kitchen floor tile we ended up purchasing from the same place we are purchasing our countertops from. We got a discount for doing both through them. My wife liked this tile and even though we don't have the counters yet, she compared it the samples at the store and felt like it went well and was what we were looking for. They are porcelain and I really like how they look. She made a great choice.
Looking from where the "addition" will be.
Looking from the old dining room.

As for the hallway and bath, my original plan was to do the tile myself to save a little money.
However... like Inspector Callahan once said... "A man's got to know his limitations." As much as I want to have more of a hand in this, there is no way I could have done what the installers did let alone in the time that that they did it. We did go with tile from a home center so it cost 1/2 of what the kitchen tile cost. I like the pattern in that it has a bit of class without screaming for attention. (Pretty much the exact opposite of how I lead my life.)
Not a great picture of the hall,
but you get the idea.
Bathroom floor. It would have taken me
a week to make the tile cuts needed.

When the exterior wall comes down in the kitchen, we'll have another row of tile to put down, but that shouldn't be too bad.


At the beginning of the week we explained to the zoning office that the maple tree in the back yard could not be protected during the construction of the addition. Besides already having damaged branches from the last storm, we were going to have to cut out a large amount of the roots along the side closest to the house for the footers. This would leave a damaged leaning tree about two feet from our house.

The recommendation that came back was that we could cut down the tree but would have to replace it with three new deciduous trees in its place. They even sent us a list of fifteen recommended trees including a pignut hickory (which I was surprised to see is actually a tree and not a medical condition.)

We agreed because, well, since we were asking for a exception to the zoning requirements, we have to play by their rules. Also, I honestly though that while it would be a waste of money to plant these trees since I couldn't imagine that they would thrive; even if they did it would be years before they were big enough to cause us problems. (Which they almost certainly would.) There will only be 12 1/2 feet between the addition and the fence... how would three oak trees fit in there and grow?

To make a long story short, we had our zoning board hearing during the week and they approved our request. We can build our addition. (And there was much rejoicing.)

They did change the three tree requirement though. Almost all the members on the board spoke up and felt that the required three trees wouldn't thrive, would eventually cause us problems and wouldn't provide the screening that the fence that was already there did. They ruled that we need to plant just one deciduous tree, anywhere in the back yard. It seems sensible and we can live with that. It will actually be fun to research the trees and pick something interesting.

Then, at the end of the week, the maple tree was cut down. Yesterday a Lorax was out there crying but I chased it away.
Before
After

We saved a few disks of wood from the stump for future projects, but I had really wanted enough to try and make some toy parts out of it. Of well, lesson learned. Put those requests in writing.

Sunday, July 22, 2012

Kitchen Cabinets

Most of the kitchen cabinets were installed while we were away on vacation. Unfortunately, we had to start using them right away so I didn't get any clean uncluttered pictures. Still, you'll get the idea. Besides, we were pretty anxious to get back to using real plates and cooking in the kitchen.

This is where our sink used to be. We are adding a small prep sink to the right of the counter once the real counter tops are in. (They are on order. Right now there are just plywood temporary ones in place.)

Here is the new wall. We moved our main sink and dishwasher to this side of the kitchen to give us a longer uninterrupted counter top on the other side. The microwave being up high resulted in us buying the step stool so Little One can still use it. The door and that part of the wall will come out when the addition is built.
Our fridge became an issue right as we were starting the renovation. In short, it died. We had it for several years and while for the most part, we liked it, we were planning on making it into a spare one in the utility room once the addition was done anyway. So, we got a new one about two months ago that was quite nice. The freezer is on the bottom and there are French doors for the refrigerator. We had it plugged-in in our living room for about a month while the kitchen floor was torn up.
We had bought it specifically for the new space but once it was in place, it was too big. (Grrrrr) It fit into the hole okay but the way in which the doors were hinged meant that they couldn't open completely because they would hit the cabinets on either side. We'll this caused some concern but it ended up being surprisingly easy to fix. My wife went to the store, told them what happened and they exchanged it for a slightly smaller model with an additional drawer. The actually refunded us the difference as well.

You can see the PEX water supplies that run up to the hot water heater in the attic in the picture above. The tentative plan is for a wine rack to cover that space but seeing as how we might go through a bottle a month... that would be about three years' worth of storage. We'll see.


We have decided to go with a gas stove. Until that is all ready we will keep using the electric one. The hood is on order and it will be properly vented up to the attic and then through the roof (our old one wasn't.) The funny square hole in the wall under the window was from this very powerful exhaust fan that was installed at counter height. It had a neat retro look but we  only used it maybe once or twice in the 12 1/2 years we have lived here. It probably resulted in all sort of lost heat during the winter since it had a wooden door that opened when it was on and wasn't really sealed in anyway. It was saved though and will be re-used in the workshop.

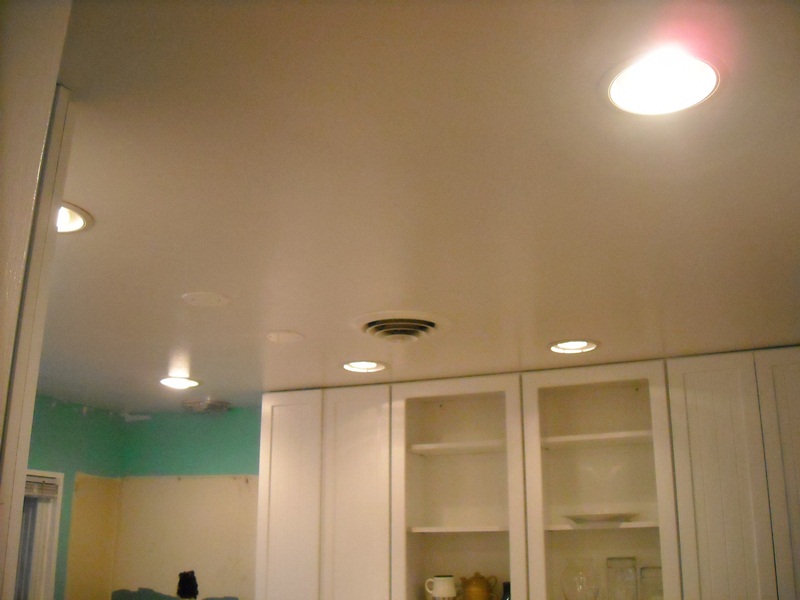
Lighting in the kitchen has also been completely re-done. We still have to install covers and what not.


We are really happy with the cabinets so far. Our contractor worked hard to install them plum and level. The fact that he pointed out where they weren't because of either the wall or how the cabinet was manufactured showed how much he cared. The cabinets are much sturdier than out old cabinets (plywood vs thin MDF shelves) and have a lot of new hardware that prevents doors from slamming and slowly closes drawers (which is a little creepy at first.)  

The pulls still need to be installed and we my reconfigure some of the drawer/shelf combinations but like I said, we are already pretty happy with them. The countertops and floor tiles are on order and will be installed at the same time.


Our hearing with the Zoning Board is scheduled for this week. Last week we got a letter from the govt agency that oversaw our application process. The letter said that they were recommending to the Board that we be allowed to build our addition based what we submitted. However... they also said that we had to protect the trees on our property during construction that were near the addition.

Really? Seriously? You are telling us that now when we have already contracted with a tree service to cut down the tree on the afternoon of our hearing?

Here are the three short reasons why this is a problem:

1) The tree in question is a mature maple tree that I constantly worry about falling into our house. It is too close now. If we left it in place, IT WILL BE LESS THAN TWO FEET FROM THE WALL OF THE ADDITION!
2) In order to dig the footings for the foundation; about half of the roots from that tree will have to be severed. So... that should all but guarantee that the tree will fall over into my house in the near future.
3) Excuse me... but who are you to tell me what trees I need to have on MY property? Enough. We followed the rules and jumped through the hoops. We don't have to give up our rights to private property because someone feels they love trees more than we do.

The tree is coming down. Not only because it has to but because I want it to. Seriously - The Founding Fathers would kick our asses for how much we allow silliness like this to take place.