Monday, November 26, 2012

Windows, Doors and Interior Framing

It is funny how the addition project has gone into overdrive so quickly. After months of standing at a spot in the yard and telling friends "We'll this will sort of be the corner..." we can now open the kitchen door and walk out into a enclosed space.

Right now most of what is happening is pretty straight forward. While the changes are reasonably dramatic, well, there is only so much to be said about a wall or door. So, in this post we are going to go a bit Children's Television Workshop on the topic and play a game we call Inside/Outside.


Inside - Patio door
Outside  - Patio

This is the new patio door. Looking out from the inside, only the far left panel moves. This lets a huge amount of light in. The plan is to make a patio on the outside once Spring rolls around. (mmmmm spring rolls...)

Inside - Utility room wall
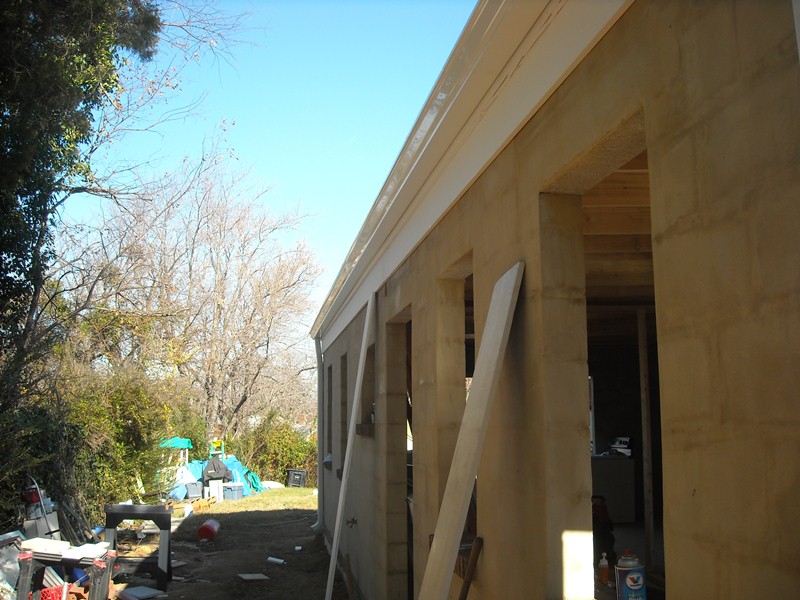
Outside - back of addition

The door for the utility room will be the "mud entrance" for the house. Luck for us, we have plenty of mud right now. The door itself is pretty neat in that it has built in blinds so theoretically, they will stay clean and in perfect working order forever. I know this to be a fact and I will not even begin to entertain the possibility that anything will ever go wrong with them.

Inside - Long view
 Outside - Short side of addition

If you could look through the windows on the short side of the house (which, well you can, but I'd yell at you to get off my lawn), you'd get the long view across the three room. Nearest is the den, then the utility room then the kitchen/dining room area.

The middle wall has the plumbing for washing machine and dryer as well as the water supply for an outside faucet running along it. The plan for the next week is to get drywall up on the inside part of that wall so that the washer and dryer can move out there and work on the doorway and 3/4 bath can take place.

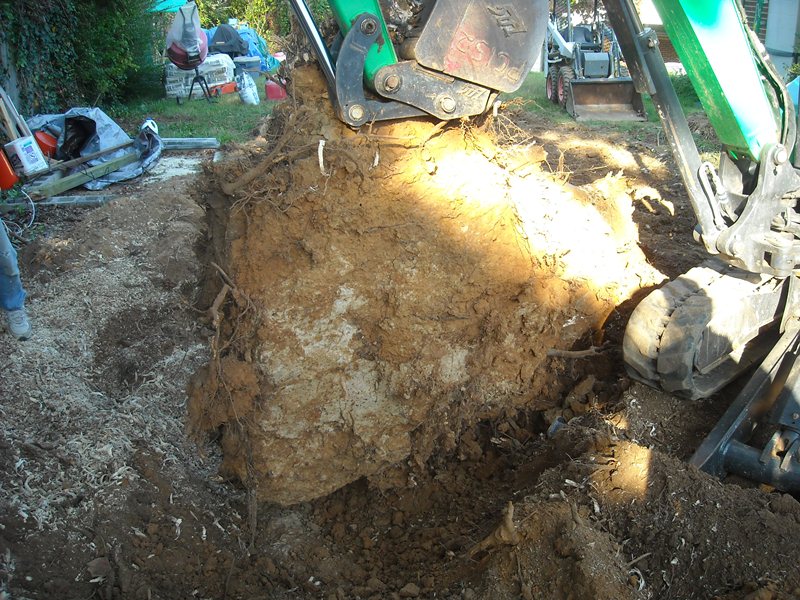
One more picture. Because we went with the slab being flush with the house; we need a lot of fill dirt to grade the yard away from the addition. Lucky for us, we just happened to know someone who had just dug a ginormous hole and needed someplace to put the dirt.


Monday, November 19, 2012

Rafters and Roof

The addition went from a muddy backyard to a recognizable structure fairly quickly. The walls were done and a few days later our contractor and his workers got the rafters up in about two days. Since there is only so much you can say about rafters, I'll let the pictures speak for themselves.


In the picture above, you can see how the rafters rest on what used to be the outside wall of the house and then are tied into the rafters in the attic of the original structure. It all ended up being very solid and very straight forward.
After the rafters were in but before the roof membrane went on, they did build the boxes for the four skylights we have planned. There will be two each in two of the rooms. Here they set them in place but they haven't been installed yet.

While the roof is called "flat" that really just means it has a low slope. Over the width of the roof it only drops about 3 or 4 inches which is plenty to get the water moving and down into the gutter.  A neat thing about the roof material we went with with is that it actually white to help reflect the heat and not absorb it the way a dark colored roof would. It is also really tough and the overlaps are heat sealed. It went on in only one day. (No, it didn't snow. It is that white.)


The plan is to get the addition reasonably sealed so that it can be tied into the rest of the house's heating while the interior work is being done. Part of that involves moving the washer and dryer to their new location in the still building utility room. Here is the wall that houses the plumbing for that. It had to be made of 2x6s to allow enough space for everything.


And that same wall from the other direction. This will be the wall to right in the utility room as you walk out of the house and into the addition through the  "Crawfish Memorial Hallway and Kitchen Bypass." We will be installing an EZ Pass Hot Lane.

So far so good. We have holidays coming up but it looks like we will have a weather/water proof addition tied into the house by the end of the year.


Sunday, November 11, 2012

Walls Go Up for the Addition

So after months of talk, plans, permits and changes to the inside of our house, it finally became time to build the actual addition.

Right before our final plans went in, we decided to go with a block addition rather than a wood frame with Hardie Board. We did this for several reasons. The fact that it was going to be a more solid structure and ultimately, surprisingly, it ended up costing about the same the wood frame would have cost helped make the decision. However, the fact is we liked the look of the block with a flat roof and a cement parge coat. The one drawback is that it reduces the rooms by about 4" along the outside walls. We can live with that.

The bricks went in quickly because it is basically like building with Legos. The blocks are 5 1/2" wide and only cost about a buck apiece. Crazy thing is that the combined cost of the brick lintels (the long "beams" that stretch over the tops of the tops the windows and doors) was about the same as the total cost of the rest of the bricks used for the addition.

This is basically the same view as above three days later.The vast majority of the work was done in two days.

Some of our existing roof needed to be removed in order to have space for the new rafters on the addition to tie into the existing house. The rafters will match up with the rafters in the attic on a one for one basis and the weight is all set to be distributed along what used to be the outside wall of our house.


This is the eventual patio door and wall o' windows space. You can see the humongo lintel that spans all 9' of opening across the top.

Basically, everything went as planned and the work was really well done. After this picture was taken, the masons also removed some of the brick from the outside wall that will soon be in the way. They also bricked over the window at the far right of the photo and cut a space for the doorway to the "Crawfish Memorial Hallway and Kitchen Bypass."

The scaffolds were pretty amazing. They went up in an instant, were rock solid and were gone before I knew it. Somebody, somewhere nailed the whole form and function thing with them.


And speaking of scaffolds... Ummm maybe 20 years ago I was absolutely captivated one night watching a Kung-Fu movie centered around, are you ready, SCAFFOLD BASED KUNG FU!

The movie was pretty funny and had this neat gimmick involving a Sholin monastery and yes.. scaffolds! A con-man looking to hide out is sentenced to build scaffolds around the walls of the monastery and as he watches the monk perform their martial arts exercises, he mimics them with his building techniques. I have to tell you, it was a crazy fun cocktail of comedy, action and flat out absurdity. It totally worked and was a lot of fun.

The movie always stuck with me and I just looked up the title (EVERYTHING is on the internet) and the movie is called "Return to the 36th Chamber" The trailer is a bit long, but you get the idea.


Sunday, November 4, 2012

Digging the Footings and Dumping the Stump

(Maybe it's me, but the title of this post sounds... odd. 'Nuff said.)

Okay, with the porch and deck out of the way and into the dumpster, the dumpster gnomes came and took it away. In its place they left... another dumpster! It is a home renovation miracle!

Our contractor got to work with his Bobcat and a rented mini-excavator and started to level the ground and work on getting the stump from the maple tree out. The number of roots was pretty amazing and they covered a very wide area. You can see some of them stacked up in the picture.

 
The stump well...errr.... stumped them for a bit. They worked at it for quite a while but it just wouldn't budge. So, another tool was rented, The ever popular stump grinder. Think of it as a circular saw with only a couple of teeth (that look like hippo molars) mounted on the front of a tracked lawn mower. It spins and wears away at the stump creating an impressive shower of saw dust.

Eventually, this wore away enough of the stump so that the excavator could pull it up out of the ground. Once the dirt was knocked free it was surprising to see how shallow the roots really were for such a big tree.

The stump was walked/pushed over to the dumpster and after a fair amount twisting, it eventually got in there.

I have to admit that as a kid, I was never a "truck" type. I don't think I ever played with bulldozer and truck type toys. Give me a tank or airplane any day. But, I have to admit now, they are really cool to watch. Crawling around doing neat stuff like digging a hole in a second and a half that would take me an hour. They really do seem alive. In a nice Mike Mulligan and His Steam Shovel way, not like Killdozer.

With the stump and roots out of the way, the trench for the footers and their required insulation panels went in very quickly. No surprises.


We kept the two pieces of slab that were already there and filled in a lot of the space with crushed concrete which apparently goes for about $7 a ton. Seriously. This allowed us to pour the slab up flush with the existing floor level of our house. Now the addition will be flush and not a "step down" when we enter it from inside the house.


The concrete pour took place and I didn't get a picture of it happening. However, here is a potential Pulitzer winning photo of what the slab looked like through my kitchen door several hours later.


The plastic trapped the moisture in and that helps with how the concrete cures. It came out great. Very smooth and level. So far so good.

The concrete subcontractor is also the masonry contractor. We needed a week and a hurricane to go by before the walls could start going up. In the meantime, the dumpster gnomes came back and worked their magic once again and left us with a replacement dumpster (that is already 1/2 full again.)

Will miracles never cease?